Enterprise Members
This is the dashboard where enterprise members can:
- Manage employee members of the platform
- Post jobs to platform members (and subscribers of our newsletter)
- Manage annual training.
- Develop custom training courses.
To provide employees access to our learning resources, begin by adding your them to your membership.
We outline the process below.
Add/Manage Employees as Sub-accounts of the Enterprise Member
Upon registering as an Entreprise member, Go to your Account.
Under your profiel, you will find a “Subscription” tab.
You will see a new link option on the Account page > Subscriptions tab. This link option, called “Sub Accounts,” looks like this:
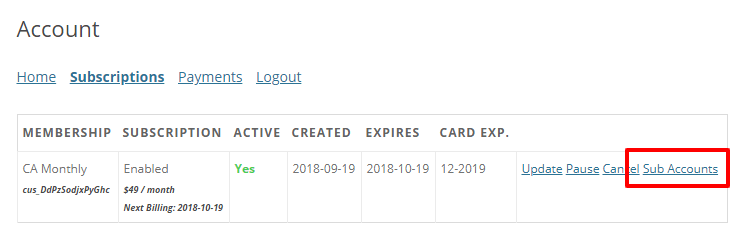
Clicking on that link will reveal the Corporate Account information for that subscription like so:
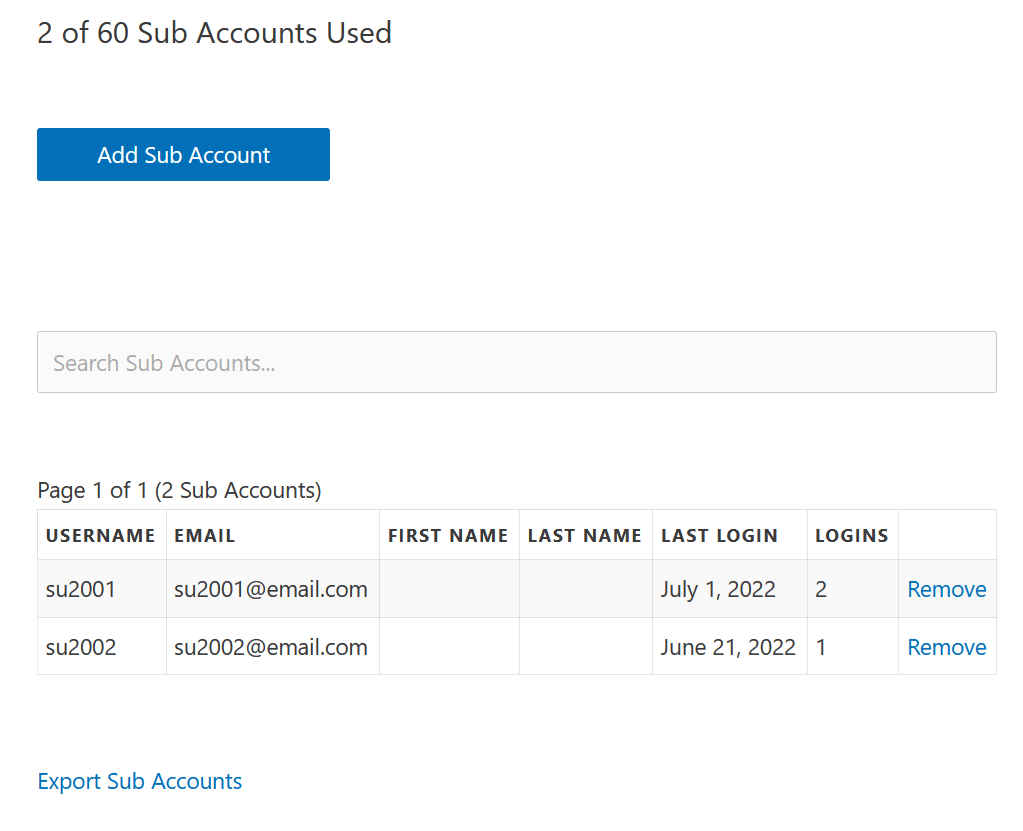
X of X Sub Accounts Used – Here, the user will see how many of their allocated sub-accounts have been used. For example, “10 of 20 Sub Accounts Used”.
Add Sub Account (button) – Clicking this button will reveal a form with the following details:
Username: (Required) Enter the username that will be associated with the sub-account. Please note that usernames cannot be changed once submitted, so it’s important that this is entered correctly.
Email: (Required) Enter the email that will be associated with the sub-account. The new member’s welcome email will be sent to this email if that option is enabled below.
First Name: (Optional) Enter the first name of the user as needed.
Last Name: (Optional) Enter the last name of the user as needed.
Send NEW members the welcome email: (Optional) Check the box next to this option to send the sub-account Welcome Email to the email address entered above.
Search Sub Accounts – Use this search bar to search for sub-accounts in the table rather than manually searching each page. For best results, search by username or email.
Sub Accounts table – Here, the Corporate Account holder can see all sub-accounts associated with their Corporate Account. The table will show the sub-account username, email, first name, last name, last login date, and number of logins. Parent users can manually remove any sub-accounts by clicking the “Remove” link next to each entry.
Previous/Next Page: The Corporate Account holder can use these options to manually scroll through the pages of sub-account users.
Export Sub Accounts: Clicking on this option just below the sub-accounts table will export all sub-accounts associated with the Corporate Account holder.
Signup URL – This is a simple URL that the Corporate Account holder can copy and send to anyone they’d like to subscribe to under their membership. Use the clipboard icon to copy it quickly.
Import Sub Accounts via CSV – The Corporate Account holder can use this section to import a previously created comma-delimited CSV file with a maximum of 200 sub-account entries. They can also enable or disable the following emails:
Courses
Each member (employee) has access to all courses, including our Training & Compliance (“T&C”) Series.
Students access all courses through the “Courses” tab within the “Academy”
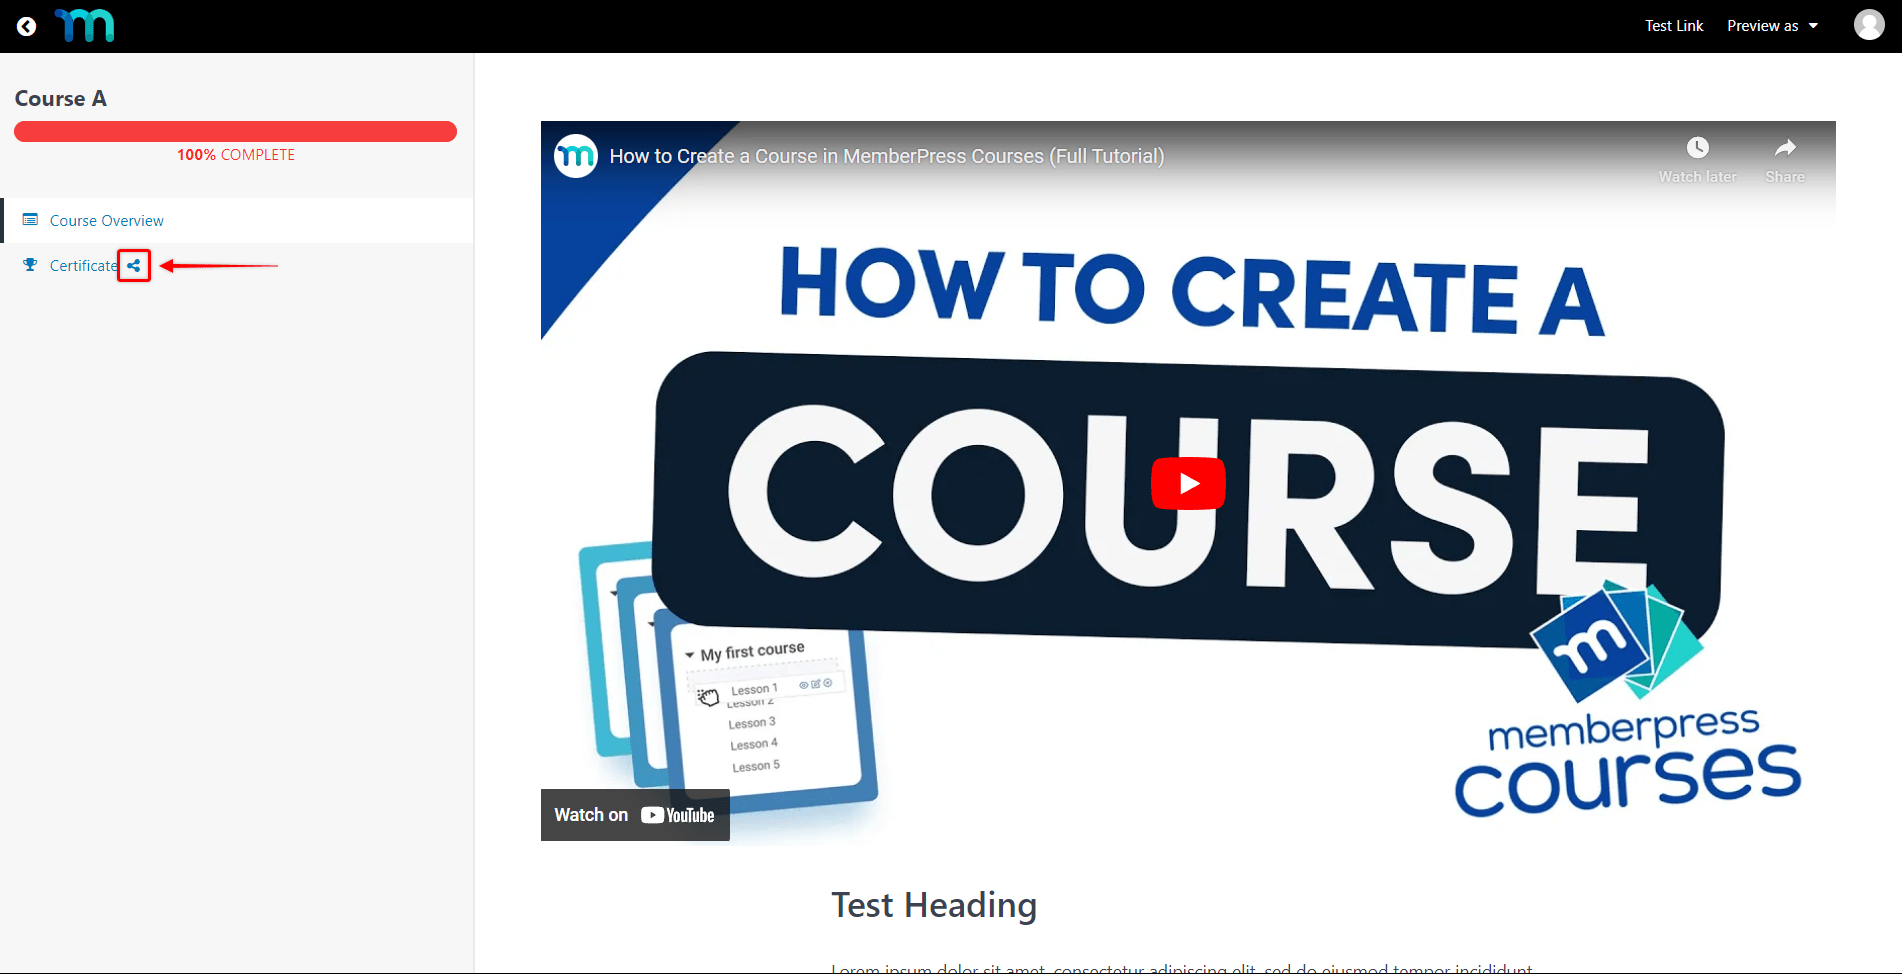
Certifcates
Individuals completing each module of a course will receive a certificate.

Access the certificate in the left-hand colum of the course page.

Users can add their certificates to their resume, LinkedIn profiles, etc. through a Shareable Link.
This will add a link icon to your certificate in the course page.
The shareable link will allow anybody to access the student’s certificate on the website without the need for them to log in.
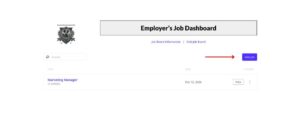
Enterprise members can post jobs and manage job postings from the Job Dashboard. (See the button on this page.)
Post a Job
First, click the “add job” button.
Add all relevant job information. Then click “preview job”. And “submit listing” or “Edit Listing” if you require changes.

You will recieve a confirmation that the job posted successfully.
![]()
Manage Jobs
You can manage job postings directly from the Job Dashboard.
As an enterprise member, we offer the creation of custom training courses of all types.
Contact us to set up a video call to discuss your training needs.
We will then quote you a price for the service.